How To Test An Alternator Out Of A Car? Explained
You’re likely to remain stranded on the road when your alternator fails. Regular testing is the only solution to avoid this from happening to you. Perhaps you’re wondering whether you can test the alternator out of the car. Here’s our explanation.
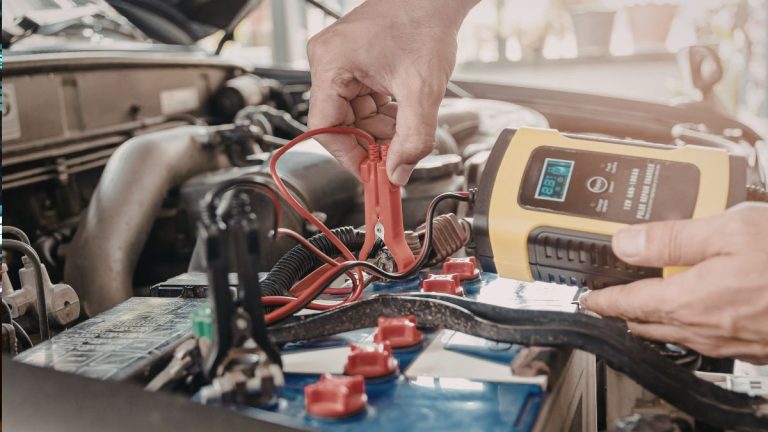
The easiest way to test an alternator is inside the car. However, you can also do it on a bench test machine. You can take it to a professional service or do it yourself on a handmade test machine. An alternator with a reading of 13 1/2 volts on the multimeter is in good condition.
Problems such as the dying sound of the radio, fading lights, A/C failing to work, and even the vehicle failing to start are usually blamed on the battery. However, its true purpose is to make the engine start. The alternator is responsible for keeping the battery charged.
How Do I Test An Alternator Out Of A Car?
You need a test bench for holding and spinning the alternator while measuring its output. The test takes a couple of minutes and the machine does a quick or longer test. A quick test is faster although it may not be accurate sometimes.
There’s a chance of passing a bad alternator. Running a longer test is a better idea to determine the state of your alternator. It takes much time but offers more accurate results. Electrical places on the alternator have rigs for mounting on and driving the belt using an electric motor.
You will need a rig for spinning the alternator at about 1000 RPM. The process involves placing the alternator into clamps on the bench test machine. Then connect the belt and test leads and use an electric motor on the tester to spin the alternator.
Having a tester and learning how to disassemble the alternator is necessary. You also must understand the specifications for resistance measurements through the slip rings, diodes, or starter windings. A DVOM is required for taking individual measurements.

How To Test An Alternator On A Handmade Bench
You need the following items to connect and test an alternator on a handmade bench machine:
- Alternator
- Battery
- Tumbler switch
- Rheostat
- Voltmeter
- Ammeter
You connect the electric motor to the bench and adjust the alternator voltage using a rheostat to 14V. The rotor speed must be 5000 rounds. Determine the recoil force of the current after the alternator has operated at the same rate.
The alternator is good when the recoil force is not less than 44A. If it’s lower, the alternator has issues with the windings, brushes have worn out, or valves or diode bridges are damaged. An oscilloscope determines alternator performance.
Rotation of the alternator rotor with a frequency of about 2000 rounds. The valve resembles a saw with equal teeth if the stator and valve windings are in great shape. You can diagnose the resistance of the excitation winding when the alternator is disassembled with a signaling device.
You need a battery and a 12V control lamp to test the alternator. You connect a battery wire to the rotor and the second wire to the slip ring assembly. The warning light must not light up during the process.
It indicates a winding closure if it glows. This means that you must replace the rotor since it has failed. Diagnosing the starter winding is also possible when the alternator is disassembled. You test the stator by connecting the control lamp to each winding output.
There’s winding breakage if the light doesn’t glow. You must get a replacement stator or winding.
How Do I Know My Alternator Is Bad Or Not Without Testing?
Get a flat-blade screwdriver which is fairly long and make a fist around the handle with your thumb pointing up. Put the blade behind the pulley on the alternator housing. As the engine is running, place the thumb in your ear and listen to sound from the bearing.
It should perhaps be smoother than the front one. If the sound from the front is very rough, it means your alternator is about to fail. Alternatively, you can use the positive lead of the multimeter and place the main electrical post and the other lead on the ground.
The reading should be about 13 1/2 volts if the alternator is in good working condition.
What Is The Right Way To Test An Alternator?
Testing an alternator involves checking its output voltage and the amperage output. Checking voltage output happens as the engine is running and all accessories are off. A healthy output voltage must be from 14V and the value increases with speed.
A lower or higher voltage means the alternator is bad.
Checking the amperage using an ammeter is also vital. The test takes place with all car accessories off. Run the engine at 1500 RPM and the ammeter reading must be equal to the alternator reading.
Key Takeaways,
The alternator plays a significant role in keeping your car battery charged. However, it wears out over time and may need replacement. Regular testing is required to determine whether the alternator is working well or not. A good idea is to test it out of the car as highlighted above.